Jennifer Steen Booher

North of the Welshpool Wharf, Campobello; June 9, 2012

 The sea glass hunting around the Welshpool wharf is some of the best I have ever seen. There wasn’t a lot right next to the pier, but to the northwest the beach was speckled with beautifully worn glass. 
According to the owner of our inn, a grand old hotel once stood on this bluff, and it very likely dumped its trash onto the beach. New trash is depressing, but old dumps are fantastic places for beachcombers (and archaeologists). You can see I brought back quite a haul!
There was a crow somewhere on the wharf making an awful racket, so after a while I pulled out my telephoto to see if I could spot him and see what had his panties in such a twist, and this popped into view:

I barely had time to press the shutter button before the eagle flew off. He must have been sitting there for a good quarter hour before I looked up to see what all the fuss was about. I happily gathered glass as the sun began to set, turning around every now and then to make sure I hadn’t attracted any more avian stalkers, and occasionally looking up to admire the view.

The sun sank,

a light fog drifted up the passage,

and the lights of Eastport came on over the water.

When it got too dark to see the beach, I trotted back to our warmly lit inn and shared a glass of wine with my husband, who dutifully admired my finds. I suspect he secretly thinks most of it belongs in the recycling bin, but we were in Campobello celebrating our twentieth wedding anniversary, and one key to a long marriage is not pointing out when your spouse’s hobbies are slightly dotty. 

What a lovely day. 
Addendum:
 I wasn’t completely happy with the colors in my first shot. What do you think – first or second try?
In the first still life: Jasper beach stone, sea glass, Ten-Ridged Whelk (Neptunea decemcostata), china, bone, brick, Blue Mussel (Mytilus edulis), Waved Whelk (Buccinum undatum), rubber, and industrial ceramic. 
In the second:  Sea glass, china, bone, Waved Whelks (Buccinum undatum), Ten-Ridged Whelk (Neptunea decemcostata), sea brick, jasper beach stone, industrial ceramic, and rubber.
Share

Friar’s Bay, Campobello Island, June 9

Friar’s Bay, Campobello Island, New Brunswick, Canada
One of Campobello’s claims to fame is that Franklin Delano Roosevelt summered there. Friar’s Bay was one of his favorite places on the island. It wasn’t mine. Granted, it was high tide and pouring rain, so the view was fairly grim, but the amount of trash on the shoreline was some of the worst I’ve seen in a rural area.

The rain kept starting and stopping, but when it rained it came down mighty hard, so I didn’t stay on the beach long. This is I saw when I looked up – black and white clouds chasing each other across the sky:
I did find some interesting things, like the whelk egg sacs (all empty), and a moon snail shell, and a tag from a Maine lobster trap. Maine traps in Canada? Well, yes – this truly is a borderland. Campobello’s only bridge connects to Maine, so residents need passports to reach the Canadian mainland. Another reminder of how arbitrary national borders are.

In the still life: Lobster fishing rope, Blue Mussel (Mytilus edulis), sea glass, granite beach stone, Soft-shell Clam (Mya arenaria), Waved Whelk (Buccinum undatum), beach china, plastic bottle cap seal, whelk egg cases (probably Buccinum undatum), lobster claw band, Moon Snail (Lunatia heros), and lobster trap tag.

Share

Simply Handmade Sewing, September issue

Isn’t it interesting that just when I finally started blogging again, the universe started sending me things to blog? The September issue of Simply Handmade is a sewing special, with lots of fall and Halloween projects to make from fabric and felt. Tucked among the projects is a little article on sewing room decor, and in that article is … me!

 See down there on the right page? That’s a photo of thread from my late grandmother’s sewing basket:

There are some other wonderful artists featured in the article, including Rebekah Leigh Marshall, Heather Kojan, and Alyssa Nassner. Pretty cool!

Share

Head Harbor Lighthouse, Campobello, NB; June 9, 2012


Well, it’s been a while, hasn’t it? I’ve missed the whole darn summer! I won’t go into the details or we’ll never get to the beachcombing, but every darn person living in my house and several other close family members seem to have had some medical event and/or life upheaval over the last few months. The long and the short of it is that everybody’s going to be fine, eventually, but I didn’t go beachcombing at all from the time we left Campobello in early June until my father-in-law’s birthday party on September 3rd. Rather than dwell on all that, I’m just going to pick up again with Day 2 of our trip to Campobello, because it was so beautiful and I found such cool things on the beaches there, and one would hope that by the time I finish telling you about Campobello, life will have calmed down and I’ll have fresh adventures to show you.
The morning of our first day we planned to go see the Head Harbor Lighthouse, also known as the East Quoddy Light, which is way up at the northern tip of the island, and only accessible at low tide. There was a thick fog, but the tides were right, so off we went!
There were a lot of warnings about the tides along the way. To reach the lighthouse, you have to scramble up and down several sets of very steep stairs and across the seaweed-covered rocks below. It isn’t terribly strenuous for the experienced beachcomber, but you really wouldn’t want to try to race the tide back!

 The fog cleared slowly as we picked our way across, and by late morning it had turned into a gorgeous day.
The lighthouse is part of a cheerful, classic, red-and-white complex.
The buildings are not open to the public (although I did hear that a group of volunteers who had come to work on the buildings got to stay there for a couple of nights) but you can wander around between them.
It wasn’t terribly crowded in early June – three or four other couples were exploring while we were there, and for short periods we were entirely alone.
 This last photo was a farmhouse we saw on the way back to the inn. How often have you taken a photo out the car window, knowing perfectly well that it will be a fuzzy mess but unable to stop yourself from trying? Well, this is the one that actually came out, guaranteeing that I won’t stop shooting from a moving car anytime soon.
There are more photos from this trip in my Flickr stream
In the still life: Basalt, schist, and granite beach stones, sea glass, beach china, Blue Mussel (Mytilus edulis), Ten-Ridged Whelk (Neptunea decemcostata), lobster claw band.
Share

Raccoon Beach, Campobello; June 8, 2012

beachcombing trash seaglass sea glass
Raccoon Beach, Campobello Island, New Brunswick, Canada; June 8, 2012

Raccoon Beach is part of Roosevelt Campobello International Park, an amazing joint effort between the US National Park Service and the Canadian government.

The park takes up almost half of Campobello Island, which is only 8 miles long. The island is part of New Brunswick (Canada) and is a bit over two hours away from home. If you follow the border between Maine and New Brunswick in the map below, Campobello is the point where the border meets the ocean (well, really it’s the Bay of Fundy.)

On our first day, we decided to go for a bike ride, so we asked the ranger at the visitor center what was interesting. “Well,” she said, “there’s a dead whale on the beach. Only been there a couple of days.” “Oh no,” another ranger piped up, “it’s been there a week or so. Might smell a bit.” So off we went to Raccoon Beach to see the whale. Pretty much everyone we talked to all weekend had been to see it, so I gather the first few days of its decay must have been quite the social occasion.

dead Northern Right Whale

See that oddly-colored lump near the center?

Raccoon Beach, Campobello, New Brunswick

Dead whale. Yup, smelled a bit. But only downwind. I later learned (through the graces of Google) that it was a baby Northern Right Whale, killed by a ship strike.

Raccoon Beach, Campobello, New Brunswick

The stones on this beach are the smooth, rounded kind we call ‘cobbles’ back home. When I try to picture the melting and mixing and uprising and tumbling processes that made these lines and speckles my brain starts to hurt. Geological time does that to me.

Raccoon Beach, Campobello, New Brunswick

There were some real beauties here, but I wasn’t sure of the park rules (in US National Parks it’s against the law to take any natural things like rocks or shells and I hadn’t thought to bring my light tent, either (doh!)) so I just took photos on site. That’s why there’s only garbage in the still life.

Raccoon Beach, Campobello, New Brunswick But then I have to admit that I find the trash almost as interesting as the stones. Shotgun shells, a puzzle piece, sea glass, rope, and the top of a soda can. A wide variety of recreational uses! And I’ve never found a jigsaw piece before. Or a dead whale. Altogether a memorable day of beachcombing.
In the still life: Pulpboard jigsaw puzzle piece, sea glass, aluminum soda can top, shotgun shell, fishing rope.
Share

Peter’s Cove, April 27, 2012

ocean, beach, driftwood, shoreline, coast, coastal
Beachcombing series No.63

I stopped by Peter’s Cove on a cool, damp afternoon when the overcast sky turned the air and the water silver.

I hadn’t had a chance to beachcomb in weeks, so when I drove past this public access right next to the East Blue Hill Road I just had to pause.

 The first thing I noticed was this pair of ducks. I think they were Red-breasted Mergansers.  I just love the female’s stubborn crest. The male’s crest must be slicked back from diving, but hers is untameable!

 They didn’t stay long.

These signs were posted all along the cove. A lot of beaches get closed for clamming when the spring meltwater and rains wash too much sediment and contaminants into the bay. Looks like this one got closed last year, too.

It was a very small and sheltered cove, and had the most striking, linear tide lines I’ve ever seen.

 They formed perfect stripes in the grasses (probably Spartina.)

 My favorite discovery was this amazingly weathered tree clinging to an undercut bank.

 No idea what species it was;

I was so fascinated with the scaly dragon-skin that the tides had made of its bark that I never thought to look at the leaves.

In the still life:   Driftwood, plastic bottle cap, Knotted Wrack (Ascophyllum nodosum), Blue Mussel (Mytilus edulis), asphalt, birch bark (Betula payrifera), Common Periwinkle (Littorina littorea), fishing bobber, acorn cap (Quercus sp.), Soft-shell Clam (Mya arenaria), lichen, granite beach stone, cigarette package fragment.
Share

Review: Op/Tech Rainsleeve

Raindrops clinging to leaves and spiderwebs are so pretty … but to photograph them, you have to take your camera out in the rain. I’ve always dealt with that by only using my (less expensive) Lumix in iffy weather, but after a year and a half with my first DSLR, the Nikon D7000, I finally got fed up with my point-and-shoot’s limitations. That was my one big take-away lesson from shooting in Fiji – learn to use my ‘good’ camera in ‘bad’ weather.

Rainsleeve and Rainsleeve Flash
Op/Tech 18″ SLR Rainsleeve


But I’m still a nervous nellie about breaking it, plus I’ve become very fond of Ginormica, and don’t want her to get soaked. So I started reading up on rainsleeves. Some people swear by a plastic bag. Some people spend over a hundred dollars on a complicated and tailored rain coat for their rig. I read dozens of reviews, and finally opted for Op/Tech’s bare bones rainsleeve.

It’s basically a fitted plastic bag with a drawstring at one end to snug up around your lens (if you have a lens hood, you can pull the sleeve up to the edge of it.) There’s a hole to fit around the camera eyepiece so you can see what you’re shooting. The plastic is thicker than grocery bags and thinner than a painter’s tarp; it feels reasonably sturdy. You could tear it if you tried, but not easily.

If it really pours, you can close the drawstring. Your hand does get sweaty inside the plastic, and yes, it can be awkward to maneuver inside the bag, but those are problems with even the high-end raingear, and this costs $6.50 for a two-pack.

Having this in my arsenal gave me the courage to bring the Nikon on the Ship Harbor field trip, where I happily played with raindrops.

Verdict: Cheap and serviceable.

All rainsleeve photos by Op/Tech USA

Share

Still Life Photos on the Go (Review of the Creative Light 20″ Light Shed)

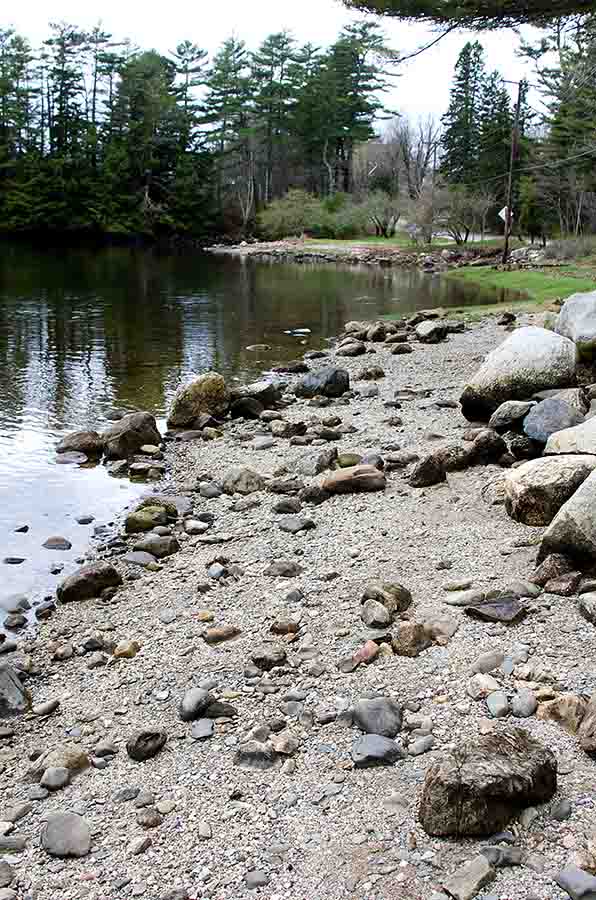
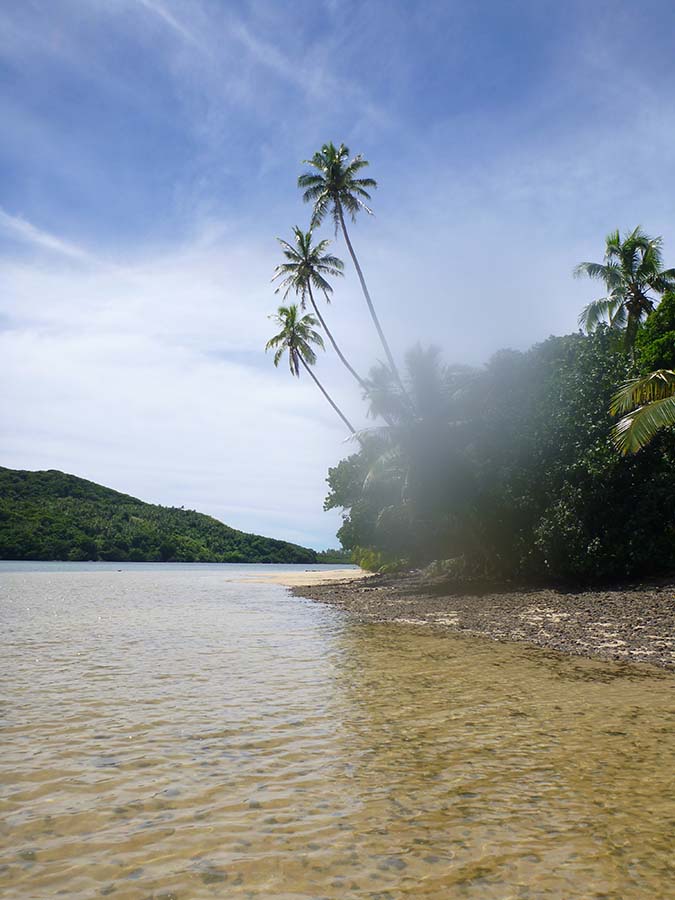
Waya Island, Kadavu; March 15, 2012 (Fiji Beachcombing series No.6)
My plans for vacationing in Fiji involved days of beachcombing and afternoons of photography. When I take the Beachcombing photos at home, I use a jury-rigged lightbox made of a three-foot-wide foamcore box filled with four construction lamps, topped with a sheet of Plexiglass, and lit from above with four more construction lamps. It’s unwieldy even in the studio, and I couldn’t image how to begin packing it. In addition, we had very strict weight limits for the flight from Viti Levu to Kadavu. Not only were our checked bags limited to 50 pounds, our carry-ons couldn’t weigh over 15 pounds. My usual carry-on bag weighs 7 pounds empty. My camera with the big lens on it weighs just over 4 pounds. And I was traveling with three scuba divers and all their gear. Packing for Fiji was an exercise in ‘do we really need that?” So when it came to a still life set-up, I had to find something that would weigh as little as possible.
Creative Light 100897 20 inch Light Shed
Enter the Creative Light 20″ Light Shed, a simple wire-framed pop-up tent. Mine weighs exactly one pound, in its case. There are a lot of similar products out there, but I read through a lot of reviews and this one stood out as sturdy, reliable, and affordable (not cheap, though). The colored backdrops are junk, as many of the reviewers pointed out. They arrive creased, and this type of fabric never sheds its folds, so I tossed them as soon as they arrived. They weren’t my style anyway. I cut a piece of foam core to fit the bottom. I like foam core because it reflects enough light to soften and brighten the interior, but not enough to cause glare or reflections. Of course it got bent in my luggage, but fortunately just a corner and I was able to work around it. I also brought a roll of white paper but didn’t like working with it: it wasn’t reflective and it got creased and dirty too easily. I’m still pondering other suitable materials.

I chose this particular size because I need a pretty large area to lay things out, and this was the smallest I thought could be useful. Any smaller and you’re talking product photography, not my peculiar layouts. I’d have like something larger, but worried that it would be too heavy and bulky. Mine folds to 13″ x 11″ x 2″  – If it were round it would be about 12″ diameter x 3″ deep. Folding it is a challenge. If you’ve ever had one of those beach shelters that is supposed to twist up and get stuffed into a bag, you’ve run into this problem before. They like their freedom, they don’t want to go in the bag, they fight being twisted, and they never fold as neatly as the factory did it. I found the video above on YouTube and watched it over and over and I twisted my damn light tent over and over until I finally got it folded up. It looks like this now:

 Lumpy, but contained. It fits nicely in a suitcase, which was the whole point. Oh – be careful when you open it. It springs open with some force. Boing! Right on my nose. You also need to straighten the wires a bit after it has been in storage (or squashed in your luggage) but it’s easy to do. Bottom line reviewing this: hard to fold but totally worth it.

Before leaving, I tried hard to find a light source that was inexpensive, lightweight, packable, and bright enough, but failed utterly. I can tell the day is coming when I will have to invest in flashes, but I’ll need at least two, and I have expensive taste. Plus they are bulky and awkward and ugly and I don’t know how to use them well. Sigh. Although now that I think about it, I said something similar shortly before I bought my DSLR.
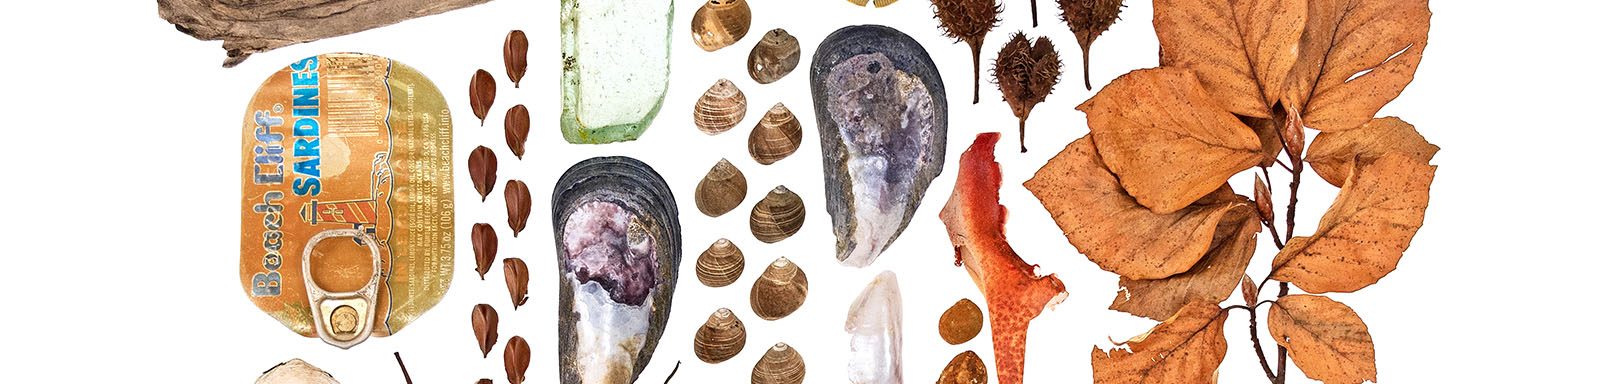
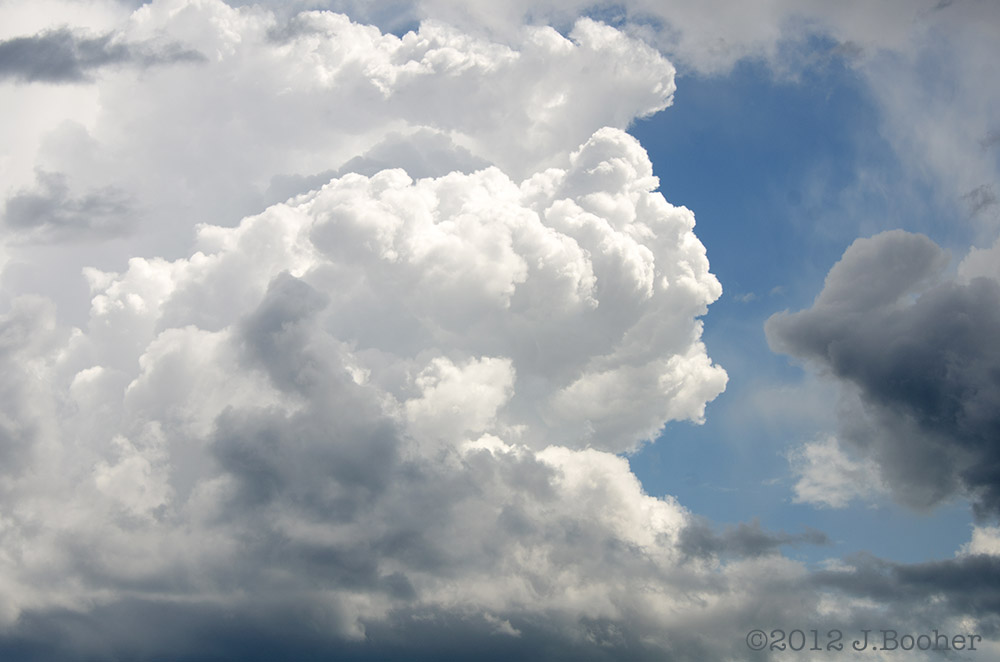
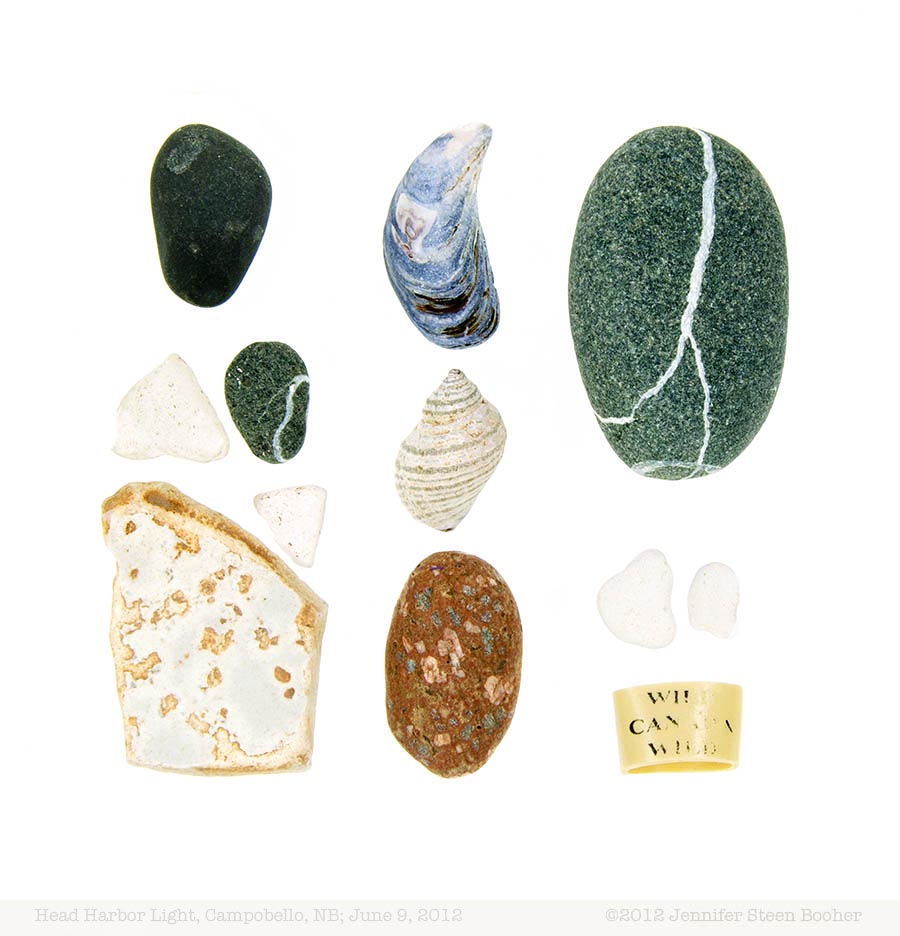
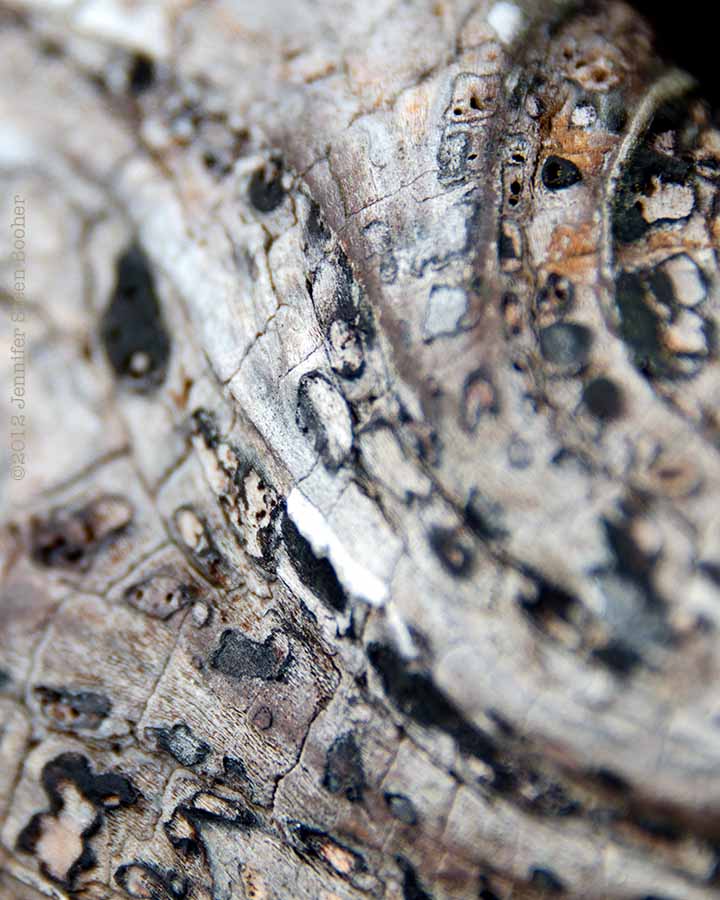
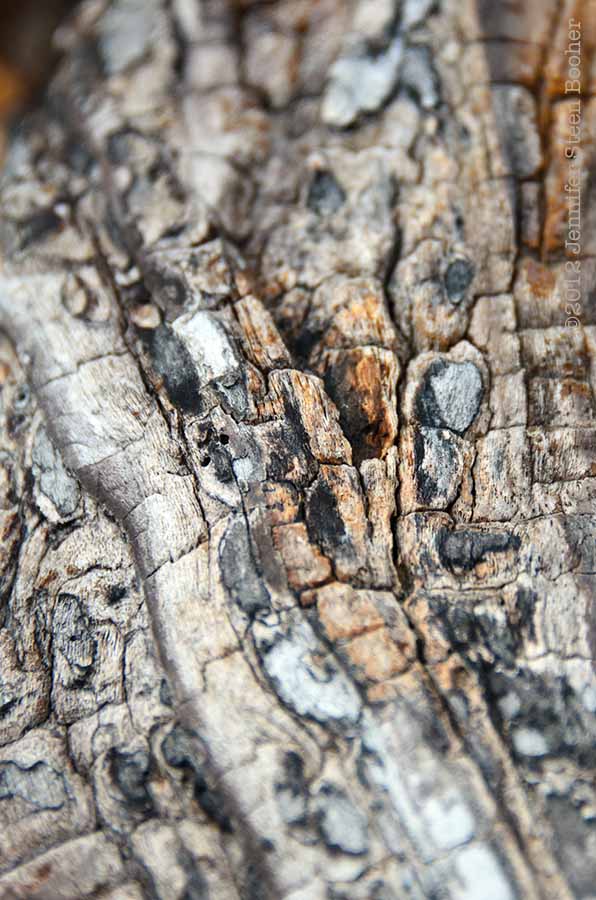
So what did I do for light? I used the sun. I really wanted artificial light because our trip was planned for rainy season. As it turned out, the skies only opened up on a still life session once. I brought the tent and my tripod out onto our bure’s deck, tried to angle it so I would get maximum sunlight but no direct light into the tent, and took the best shots I could. Here’s an image shot in RAW (shrunk for web display and watermarked, but otherwise straight out of the camera):
Keep in mind that RAW always has that flat look to it – it hasn’t had any formulae applied to the data yet, which is the whole point of shooting in RAW. 
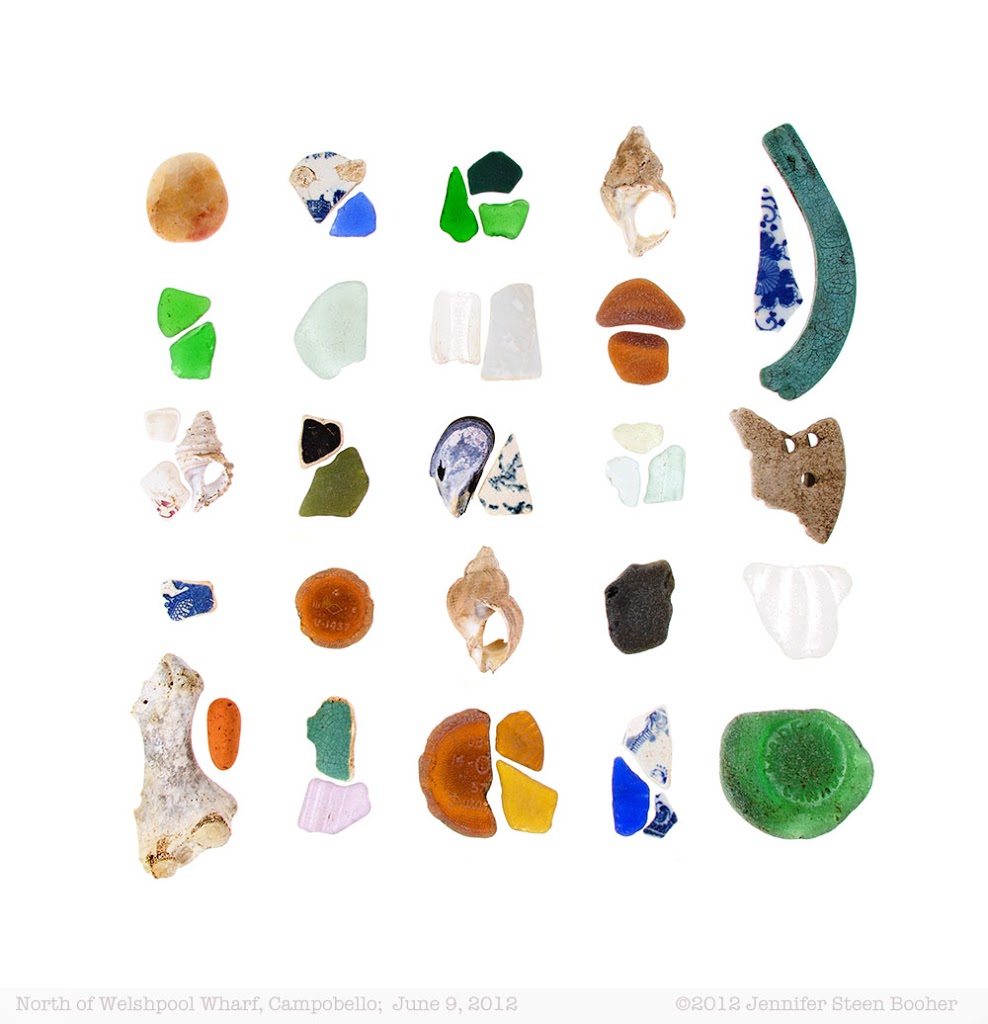
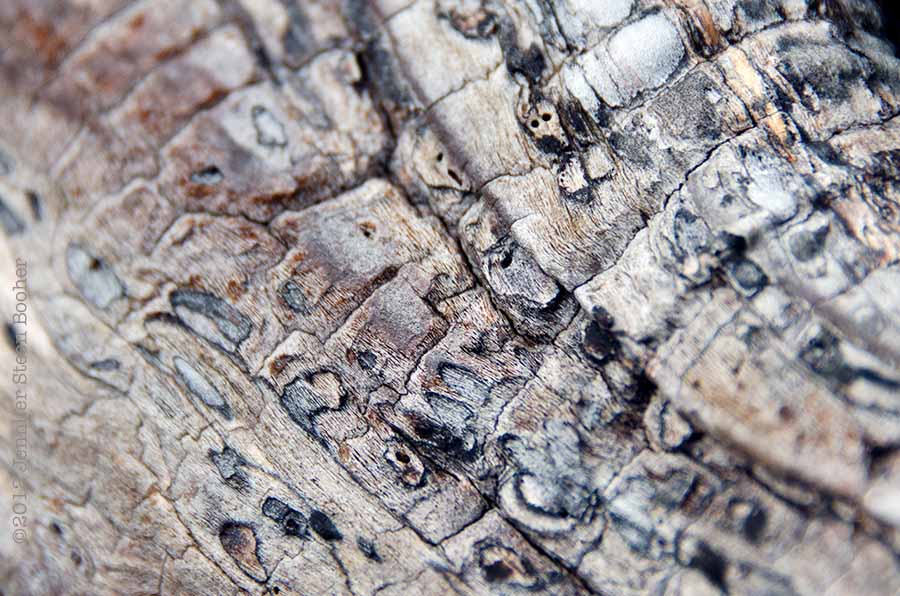
And here’s what it looks like after brightening, color-balancing, and sharpening:

And there you have it: light tent + sunlight + tripod + Photoshop = portable still-life studio!
_______________________________________________________________________
The light tent link above leads to Amazon, where it is selling for $58. It’s also available at B&H Photo for $58, and both sites offer free shipping. Disclosure: I get a slight commission if you follow the link and purchase from Amazon. I personally order from both companies: I tend to buy from Amazon when I have a random bunch of things that qualifies for free shipping, and from B&H (or my excellent not-quite-local camera store) when I’m getting some expensive technology.
Share

Review: Panasonic Lumix underwater camera (DMC-TS3)

Damselfish in a coral head off Two Trees Island, Kadavu, Fiji
Some of you were curious about the underwater camera I used for these shots.
It was a Panasomic Lumix waterproof point-and-shoot. I bought mine from B&H Photo, but it is no longer available there. Amazon still carries it, though, starting at $326. (There’s a more recent model out now, and although this review is limited to the one I used some of the pros and cons will remain the same.) 
Panasonic Lumix DMC-TS3 Digital Camera (Orange)
Panasonic Lumix DMC-TS3 Waterproof Digital Camera

The essential specifications are: 12MP, 28 mm wide-angle Leica lens, 4.6x zoom, and waterproof to 40 feet (some directions say 30 feet, but since I’m a snorkeler it doesn’t matter. I’d have to tie a rock to my leg to get below 5 feet!) The manufacturer gives very specific direction on rinsing and cleaning the camera before opening it, and I was careful to follow them. Some people have reported leakage, but I was lucky and had no problem.

Negative

The lens is flush with the camera body, and hard against the top edge where you naturally hold the camera, so it’s very easy to get a finger in front of it. Even after working with it for 2 weeks, knowing about this problem, I still had the occasional finger show up in my photos! There’s also no cap or cover for the lens, so you can’t just toss it in your bag or pocket. I’m thinking of modifying the body with some stuff I have called Sugru to make a lip around the lens so I can feel it.

The macro function is pretty good, although the depth of field is shallower than other point-and-shoots I’ve had, with lots of distortion just outside the focus point. It can be a cool look, but also a pain, especially when you are being tossed in a current and your mask keeps you from seeing exactly what’s in your viewfinder.

I haven’t played a lot with settings, keeping it mostly on iA, or no-flash. It tends to wash photos out a bit both underwater and on land – I’ve had to adjust every single one in postprocessing. Auto focus is unpredictable – I threw away a lot of blurred shots. I expected that with the underwater shots, but was surprised by the land ones. It has a lot of trouble with strong light contrast (like high noon) both in and out of the water. Lots and lots of blown-out highlights above and below water.

My usual carry-everywhere camera is another (not underwater)  Lumix, and I don’t have any of these issues with it. In fact, it’s an awesome little camera, which is one reason I bought this one.

Positive

It’s waterproof, so no worries if you get caught in a tropical downpour, or slip on some rocks and sit down in a tidepool. It rained a lot while we were there, so I didn’t carry my Nikon with me very often at all.

As for underwater photos, well, I knew it would be an experiment, and that I’d get better results with things that were closer to the surface, because of the available light. It still washed things out, just like it does on land, but no worse than most (non-pro) underwater photos I’ve seen. Here are examples of photos straight out of the camera and after color-balancing.

 Fogging
When it got very very hot, or perhaps when there was more temperature change than the camera cared for, the lens would fog up. The instruction manual says this is due to humidity (and yes, it was godawful hot and humid) and the remedy is to open the camera up and let it dry out. Since it always fogged up while I was out and about, I couldn’t do that, but I found that if I turned it off and let it sit in my pocket, it would de-fog after half an hour or so. I lost a lot of photos to fogging. Here’s what fogging looks like through the lens:
 
The first one is more thoroughly fogged than the second. After a while I started playing with the fog:
but it was still annoying.
My personal take-aways from the trip were:
 1. I need to stop treating my Nikon so delicately and start carrying it around more!

2. You need specialized equipment to get really good shots underwater. But it would cost me upwards of $3K to get a housing and lights for my Nikon so I bought this little guy instead. I suspect if I work with it more, choose my time-of-day more carefully, and get the hang of the funky macro, I could get some pretty good shots with it. Some snorkeling skills that would help are
-the ability to hover in a current
-the ability to hold the camera very still even when being sloshed by waves
-the ability to see through a snorkel mask well enough to read the LED display (half the time I was just pointing and guessing what was in the viewfinder!)
-and maybe farsightedness (I need to get a prescription mask for my nearsighted eyes!)

3. Fogging of the lens is unpredictable, inconvenient, and will make you lose photos opportunities in a humid environment.

4. Unless you are a diver, make sure you choose a site where the reef is less than 10′ deep.  If you are a diver, you need big lights. The divers in the photo above are about 15 or 20′ down, and you can see the difference – everything down there is blue.

5. This is tough, handy, versatile little camera. It has its faults and its limitations, but so do I.
Share

Fiji: The Meke

This is the last post about our adventures in Fiji. Life in Maine has been moving so fast that the Fiji photos have gotten pushed aside by all the cool stuff happening right now. It’s late spring, the birds are mating, baby barnacles are settling over everything, the lilacs are almost over and the lupines are starting … which makes it hard to focus on amazing things that happened three months ago on the other side of the world.
 But I really wanted to show you the meke. One evening, a troop of boys and girls from the Ratu Varani School (you saw it a few posts back) came over to perform for us as a school fundraiser. I think most of the boys were between 8 and 13 years old, although as I’ve mentioned before I stink at age-guessing.  Here they are with their teachers, coming across the mudflats from the village, partially in costume.
I think the skirts are made of banana leaves.
The meke is a combination of song and dance that tells a story, but I never figured out what most of the stories were. One particularly wonderful dance had George (the guy who brought us the baby boa, who is fantastic at the traditional dances) imitating the animals of the jungle, and the audience guessing which ones. 
Boys and girls danced separately – unfortunately I didn’t get any good pictures of the girls, who looked like they were in their early teens.  They wore white shirts with red sulus, which was charming but not nearly as picturesque as the boys’ banana leaves. I’ve seen videos from the main islands that show girls dancing in outfits that look more like my sterotypical image of a hulu dancer, with grass skirts and skimpy tops, but Kadavu is more isolated and fairly conservative, so it was shirts and sulus for the girls.
I’ve attached a video (not mine) at the end to give you a rough idea of what this sounded like. You’ll notice there are limited instruments, but amazing vocal harmonies. Richard, one of Matava’s owners, said that if you get four Fijians together, you get four-part harmony, and if you get ten Fijians together, you get 10-part harmony. My ear isn’t good enough to really sort out what I heard, but everyone I met could (and did) burst into song at some point, and never alone. Every night a group would sing around the kava bowl until the kava ran out. I would listen from my bure (my young daughter made sure I got to bed very early every night) and savor the music.
[Warning, a full paragraph of photo jargon follows, for those who are interested.]
It was dusk when they began, which presented a few challenges photographing the dancers. The only lighting was kerosene lanterns. I had my Nikon on  a tripod (which makes me insanely self-conscious because I look like a TV news crew and am not nearly at a skill level that lives up to my gear) and just kept upping the ISO as night came on. By the time it was fully dark in the photos below, I was at ISO 5000. I confess I hardly saw the dancers, I was trying so hard to photograph them! I shot in RAW and cleaned up the noise in post-production. I also took about 800 shots, of which I kept 139 (so far) and of which only 9 are worth showing you. TGFD = thank god for digital.
[End of jargon.]
The dances look and sound something like this:

Video courtesy of YouTube.
Share